Friday, September 30, 2011

Search, Ponder & Bake! Scripture Cookies

0 comments
This is a really fun activity that can be done with a variety of ages and situations. I am in charge of the Family Home Evenings for the young singles in my church and coming up with exciting activities each week can be exhausting, but this one was quite a success!  My sister also adapted this to use as a Sharing Time lesson. As you'll see from the recipe at the end of the post, the ingredients to make the cookies have to be searched for in the scriptures. We split into several groups and had the ingredients measured out on a table to make it a little easier/cleaner.  Once they read the scripture to figure out the ingredient, they would come up and ask for them.  Most of the ingredients are obvious, but a few of them take a little bit of pondering. Each group had their own mixing bowl and cookie sheet and once their cookies were made up they put them in the oven and enjoyed each other's company while the cookies baked.  We also had milk to drink with the freshly baked cookies. 


I am a firm believer that the announcement sets the tone for the whole activity so I made up a couple batches of the cookies and tagged them with these headers.  The specific information about the activity was on the back of the header.  Everyone was really excited for the activity!

.....And here's the recipe! I used our regular chocolate chip cookie recipe and looked up the scripture references for the ingredients.  (Thanks to the internet, searching the scriptures is a whole lot easier than it used to be!).  Luckily, all but one of the original ingredients were found so I just made a simple substitution.
If you have any trouble figuring out the exact ingredients, here are the actual ingredients!

Psalms 22:29 - Fat (Shortening)
Psalms 55:21 - Butter
Jeremiah 6:20 - Sweet Cane (White and Brown Sugar)
Jeremiah 1:11 - Almond Tree (Almond Extract)
Luke 11:12 - Egg
1 Kings 4:22 - Flour
Galatians 5:9 - Leaven (Baking Soda)
Doctrine & Covenants 101:39 - Salt
Proverbs 17:1 - Morsel (chocolate chips, m&m's, etc)


Enjoy!

Thursday, September 29, 2011

Halloween/Fall sign giveaway winner

0 comments
Sorry for the lack of posts recently. I am taking a short break to enjoy a fabulous vacation in Hawaii! I hope you all enjoy this beautiful morning sunrise.
But, I thought I'd better drop in to announce the winner of our Halloween/Fall sign giveaway. The winner is:


I found your site through Ucreate and am thrilled!!!! I love the pumpkin patch sign. Super cute!!!


Please send us an email with your contact info to giveaway@burtonavenue.com.

It was so great to see so many enter (and a huge relief that our first giveaway was a success)! I think we'll do another one soon. So check back often. Aloha!

Monday, September 26, 2011

Cardboard Box Pumpkins

0 comments
I was cleaning my kitchen and had handfuls of boxes to put in the recycling when I decided that they would make the perfect little pumpkins. I picked two boxes of Jell-O and a box of Rice-A-Roni to transform into these cute little pumpkins.


I started by filling them with beans and then wrapping them in craft paper.


Next I painted the boxes orange and also cut up a cereal box and painted it brown for the stem and green for the leaves. I cut strips from the brown and curled them on a pencil to make the stem. I found a template for a pumpkin leaf. I folded the leaves to give them a more realistic look.


I painted some stripes on the pumpkins. After that dried I hot glued the stem and leaves on the pumpkins and was finished. All of the supplies were stuff that I had around the house, so these little guys cost me nothing!!!


Thanks for stopping by.


Sunday, September 18, 2011

Halloween/Fall Sign Giveaway

0 comments
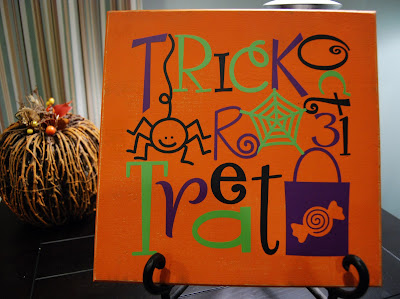
Last week, our blog reached 100 followers. What better way to celebrate than with our first giveaway. We are giving you a chance to win one of these three cute vinyl signs. All you have to do to enter is follow this blog and let us know which sign you would pick!


Giveaway closes 9/26/11.

Saturday, September 17, 2011

Shabby Flower Shirt Tutorial

0 comments
For picture day I had picked out some really cute outfits for my 3 girls to wear, except that my youngest daughter wore it before picture day and got a big stain on the shirt. I had some shabby chiffon flowers and a white shirt so I decided I would make her a new shirt to wear.


I started by cutting off the netting from the back of the flowers

Next I laid out the flowers on the shirt in the design that I wanted. With a needle and thread I did a quick stitch to keep them in place. To keep them secured on the shirt I found the center of the flower and sewed a few stitches.

Then I found a couple of openings in the flowers and sewed a few stitches through each of those openings.

Here is the finished shirt, which my daughter loved. I will be making two more for my other girls.

Friday, September 16, 2011

Multi-Color Vinyl Signs

0 comments
I love vinyl, I mean I really love it. I have it all over my house. I use it to decorate, organize, and to just make things cute. But, sometimes, the regular one color vinyl sign isn't enough. Sometimes...I need more color! I'm going to show you how I create multi-color vinyl signs. I know every program and digital cutter is different, but for the most part, I think these instructions should work (or at least get you on the right track).
I start with the image I'm going to cut. I size it and center it on my axis.
Then, I add four arrows to the outside edge of the image. Two are vertically centered and the other two are horizontally centered. I also add small x's inside the graphic (these are used as registration marks).
Next, I color the letters and shapes to match the vinyl I will be using (you may need to ungroup everything first). If this step can't be done in your software program, it can be skipped. It just makes it a little easier to see what color it's going to be.
Copy and paste the graphic so there are as many graphics as the number of colors you will be cutting. I'm cutting two colors, so I made two graphics
Then, in each graphic, delete the parts you don't want in that color. Be sure you don't delete any x's. The arrows only need to be on one graphic - the color you will apply to your project first.

Cut, weed, and tape your vinyl. Use a ruler or straight edge and draw a line that extends from tip to tip of the triangles, horizontally and vertically.
 Measure the center points of the edges of the surface you will be applying the vinyl to. Draw straight lines that connect these points (use pencil or something that can easily be cleaned off).
Remove the vinyl from the backing. Position so the lines all match up. Apply the vinyl (including the x's) to your surface.
Remove the backing from the next color. Match up the x's and apply the vinyl.
After all layers of the vinyl have been applied, you can carefully remove the x's and arrows and clean off the pencil marks.
Leave as is, or drill holes and attach wire or ribbon to hang.
This was a super simple two color design. You probably could have put this together without all the extra work. But when you have more complex multi-color designs, these extra steps ensure you will get great results every time.
Here is an example of a more complex design and the screen shot of how I broke apart the 3 colors.
Enter our giveaway for a chance to win one of these cute vinyl signs.
Linking to these great parties:
Monday Amaze Me Mon, Craftastic Mon, Craft-O-Manic Mon, Homemaker Mon, Inspire Me Mon, Link Party Mon, Mad Skills, Mad Skills Mon, Made By You Mon, Made With Love Mon, Make Something Mon, Making Mon Marvelous, Making the World Cuter, Market Yourself Mon, Marvelous Mess Mon, Masterpiece Mon, Metamorphosis Mon, Motivate Me Mon, Blog Party, Project Parade, Share Mon, Thrifty Décor Chick, Unwasted Homemaking, Craft Catwalk, Craftaholics Anonyomous Tuesday All Thingz Related, Anti Procrastination Tues, Get Your Craft On, Handmade Tues, Home Stories A to Z, It's Sew Fun, maze Me August, Nifty Thrifty Tues, Power Of Paint, Show Me What You Got, Sizzle into Summer, Take A Look Tues, Teriffic Under Ten Tues, Time To Shine, Wednesday Anything Goes, DIY Under $5, Hoo's Got Talent?, Idea Sharing Wed, Linkin' with Luna, Look What I Made, Penny Pinching Party, Primp Your Stuff Wed, Show And Share, Show And Tell, We Did It Wed, What I Made Wed, What I Whipped Up Wedn, What’s Up Wed, Whatever Goes Wed, Wicked Awesome Wed, Wow Me Wed, Wow Me Wed, Thursday A Crafty Soiree, Almost Fri Flaunts, Catch A Glimpse Thur, Commercial Break Thursday, Get Your Brag On, Hookin' Up, Share Awesomness Thur, Show Off Your Stuff, Strut Your Stuff ThurCatch as Catch Can, Transformation Thur, Under $100 Linky Party, Friday Bacon Time, Delicate Construction, Fabulous Fri, Fantabulous Fri, Feature Your Sassy Sites, Feature Yourself  Fri, Flaunt It FriFree For All Fri, Fri Favorites, Fri Link Party, Frugal Fri, Frugalicious Fri, Hodgepodge Fri, I'm Lovin' It Fri, Inspiration Fri, Lovely Crafty Weekend, Remodelaholic Fri, Show and Share Day, Scissors & Spatulas, Weekend Wander, Weekend Wrap-Up, Whatcha Got Weekend, Saturday Check Me Out Sat, Sat is Crafty Day, Sat Nite Special, Sat Spotlight, Show & Tell Sat, Summer Lovin' Sat SoireeSunday Just Something I Whipped Up, Nifty Thrifty SunSister Sister Sun, Sun Showcase, Sun Scoop, Think Pink Sun, You're So Creative

Tuesday, September 13, 2011

Measuring Cups/Spoons Organizer

0 comments
While wasting away my day on Pinterest looking online for some inspiration, I came across this fabulous  way to organize measuring cups and spoons. I really love organization tips and tricks, especially when they are geared toward the kitchen. Our kitchen is somewhat lacking in drawer space, so I figured this would be a great way to give me a little extra room.

This was a really simple project. I cut my wood a couple inches smaller than the door and routed the edges. (the routing could be skipped, but I just set up a router table and was really excited to try it).
 
I mod podged some scrapbook paper to the front. After it was dry, I lightly sanded the paper and edges of the wood. I really love that worn look! Then, I applied a top coat of mod podge.
I spaced the measuring cups/spoons on top of the board and marked for pilot holes. I pre-drilled and then screwed in the hooks.
I added vinyl lettering so everyone will know just where they go. I used double sided tape to hang them on the doors.
Our cabinet doors are rather small, so I had to use three pieces of wood to fit everything.
Ah, organization. Love it.
Super easy and super cheap.
Wood - $2.44
Hooks - $0.99
Paper - $0.60
Clearing up precious drawer space - priceless!
Be sure to check out these great linky parties:
Monday Amaze Me Mon, Craftastic Mon, Craft-O-Manic Mon, Homemaker Mon, Inspire Me Mon, Link Party Mon, Mad Skills, Mad Skills Mon, Made By You Mon, Made With Love Mon, Make Something Mon, Making Mon Marvelous, Making the World Cuter, Market Yourself Mon, Marvelous Mess Mon, Masterpiece Mon, Metamorphosis Mon, Motivate Me Mon, Blog Party, Project Parade, Share Mon, Thrifty Décor Chick, Unwasted Homemaking, Craft Catwalk, Craftaholics Anonyomous Tuesday All Thingz Related, Anti Procrastination Tues, Get Your Craft On, Handmade Tues, Home Stories A to Z, It's Sew Fun, maze Me August, Nifty Thrifty Tues, Power Of Paint, Show Me What You Got, Sizzle into Summer, Take A Look Tues, Teriffic Under Ten Tues, Time To Shine, Wednesday Anything Goes, DIY Under $5, Hoo's Got Talent?, Idea Sharing Wed, Linkin' with Luna, Look What I Made, Penny Pinching Party, Primp Your Stuff Wed, Show And Share, Show And Tell, We Did It Wed, What I Made Wed, What I Whipped Up Wedn, What’s Up Wed, Whatever Goes Wed, Wicked Awesome Wed, Wow Me Wed, Wow Me Wed, Thursday A Crafty Soiree, Almost Fri Flaunts, Catch A Glimpse Thur, Commercial Break Thursday, Get Your Brag On, Hookin' Up, Share Awesomness Thur, Show Off Your Stuff, Strut Your Stuff ThurCatch as Catch Can, Transformation Thur, Under $100 Linky Party, Friday Bacon Time, Delicate Construction, Fabulous Fri, Fantabulous Fri, Feature Your Sassy Sites, Feature Yourself  Fri, Flaunt It FriFree For All Fri, Fri Favorites, Fri Link Party, Frugal Fri, Frugalicious Fri, Hodgepodge Fri, I'm Lovin' It Fri, Inspiration Fri, Lovely Crafty Weekend, Remodelaholic Fri, Show and Share Day, Scissors & Spatulas, Weekend Wander, Weekend Wrap-Up, Whatcha Got Weekend, Saturday Check Me Out Sat, Sat is Crafty Day, Sat Nite Special, Sat Spotlight, Show & Tell Sat, Summer Lovin' Sat SoireeSunday Just Something I Whipped Up, Nifty Thrifty SunSister Sister Sun, Sun Showcase, Sun Scoop, Think Pink Sun, You're So Creative

Saturday, September 10, 2011

Spider Web (Reverse Stencil)

0 comments
Earlier this week, I showed how to make a spider web garland with freezer paper. Now, I want to show how to create the opposite look using the negative spaces of the stencil. This is actually the look I was originally going for, but the other way was a little less time consuming.

The first few steps are exactly the same. Cut off a section of freezer paper about 6" longer than your spider web (my webs were about 16" x 9", so I cut off a section about 22"). Fold the freezer paper in half. Draw or trace the outline of a spider web.
Outline until you get the lines the thickness you want. The line on the fold should be half the thickness of the other lines. Carefully cut out and save the white spaces (these spaces are going to act as the stencil, so you want to avoid cutting through them).
Open it up and lightly iron onto your fabric.
Next, take all the white pieces and put them back in the spaces they were cut out of. Lightly iron them in place.
Carefully pull up the web part of the stencil. You should be left with only the negative space of the web. You can now do a more thorough job of ironing the pieces down.
Give it an uneven coat of paint and let dry. Peel off the rest of the freezer paper and cut around the edges to match the shape of the web.
I'm gonna use this technique to make two large webs to hang on our front porch railing. I think they will look super cute with a big stenciled spider crawling on them. I'll post an update when/if I get that done!

Friday, September 9, 2011

Counting Sheep

0 comments
Do you ever have idea come along that is super awesome, but also would be a ton of work? Like a ton, a ton of work? So then you think about not doing it, but the idea seed has already been planted and you know WHEN you pull it off that it’ll be totally perfect? Well, two weeks ago I crossed that fine line between ambition and stupidity. More like I ran past the line and dragged my mom and sisters with me. (Thanks guys!) I am happy to report that my crazy idea was able to come to life and turned out great!

Last year for Christmas my sister gave me the Cake Pops book and can I just say how much I love Bakerella? After many, many (many!) hours, 95 sheep cake pops were completed, tagged and ready to go. There were supposed to be 96 sheep but one got lost. We didn't realize this until after we'd cleaned up most of the stuff, so we just left it that way. (We did leave the others to go search for it of course) The instructions for these cake pops can be found in Bakerella's book. It's best to read her's tips before you get started; especially if you're like me and decide to tackle a big ridiculously huge project your first time, be sure to read all of Bakerella's tips and give yourself PLENTY of extra time. When she says it'll take a couple hours, I'd suggest you times that by a few large numbers.

I used Junior Mints for the faces; I think this is the only thing I used differently than what she suggested and I've got about a million tiny shaped hearts left over. The hardest part was making sure the candy melts were exactly the right temperature. Once we got that figured out, things went a lot more smoothly.

After the cake pops dried, I wrapped them with a piece of cellophane and attached a tag I printed out and cut using my scallop and circle punches. I wrapped the styrofoam block with lime green wrapping paper then attached a picket fence that Angie cut out for me on her die cutter. I just love how everything turned out! Needless to say, these were a huge hit!


I guess I finally understand why counting sheep will make you sleepy!
 
ban nha mat pho ha noi bán nhà mặt phố hà nội